
 Soda bottle bioreactors are designed to be used as tools for composting research. They are small and inexpensive enough to enable students to design and carry out individualized research projects, comparing variables such as reactor design, moisture content, and nutrient ratios of mixtures to be composted.
The design described here is meant to be used as a starting point only -- please improvise and allow your students to use their own ideas in designing and building their bioreactors.
| Bulking Agents | Food for the Microbes |
|---|---|
| wood shavings | lettuce scraps |
| small wood chips | carrot peelings |
| newspaper strips | apple cores |
| pieces of paper egg cartons | bread crusts |
| chopped straw | banana peels |
| weeds | |
| grass clippings |
In these mini-bioreactors, composting proceeds best if the bulking agent and food scraps are cut or chopped into roughly 1-2 cm pieces. Soak the bulking agent in water until thoroughly moist, then drain off excess water.
7. Mix roughly equal amounts of bulking agent and food scraps, then fill your reactor. Remember that you want air to be able to diffuse through the pores in the compost, so make sure to keep your mix light and fluffy and do not pack it down.
8. Put the top piece of the soda bottle back on and seal it in place with tape.
9. Cover the top hole with a piece of screen or nylon stocking, rubber banded into place. Alternatively, if you are worried about potential odors you can ventilate your bioreactor using rubber tubing out the top. Simply use the screw-on soda bottle cover with a hole drilled through it for a piece of rubber tubing, which leads out the window or into a ventilation hood.
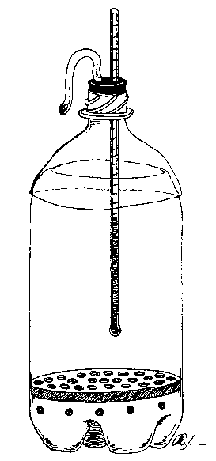
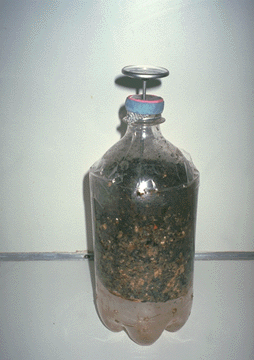
10. If you want to eliminate the possibility of flies becoming a problem, you can cover all air holes with a piece of nylon stocking or other fine-meshed fabric. ![]() 11. Insulate the bioreactor, making sure not to block the ventilation holes. (Because these soda bottle bioreactors are much smaller than the typical compost pile, they will work best if insulated to retain the heat that is generated during decomposition.) You can experiment with various types and amounts of insulation.
11. Insulate the bioreactor, making sure not to block the ventilation holes. (Because these soda bottle bioreactors are much smaller than the typical compost pile, they will work best if insulated to retain the heat that is generated during decomposition.) You can experiment with various types and amounts of insulation.
Now you are ready to watch the compost process at work! You can chart the daily progress of your compost by taking temperature readings, inserting a thermometer down into the compost through the top of the soda bottle. Using temperature charts, you can compare variables such as the types of compostable materials, moisture levels, amounts of air flow, and insulation systems.
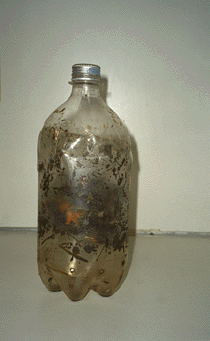 Because the bottles are so small, you may not end up with a product that looks as finished as the compost from larger piles or bioreactors. You should find, though, that the volume shrinks by 1/2 to 2/3 and that the original materials are no longer recognizable. You can let the compost age in the soda bottles for several months, or transfer it to other containers for curing while starting up a new batch of compost in the soda bottles.
|
Composting |
Engineering |
in Schools |
|
Cornell Waste Management Institute © 1996
Department of Crop and Soil Sciences
Bradfield Hall, Cornell University
Ithaca, NY 14853-5601
607-255-1187
cwmi@cornell.edu